LY Focus 0961 User Manual
 (ooh, the irony…!)
The auto-focus module, part of a MOPA fiber laser, did not come with a manual. I was able to dig one up on Alibaba, consisting of a wiring diagram and fragments of English words and sentences intermingled with screenshots of the device set to Chinese (see below).
Yet it dawned upon me that this scripture beared some truth between its JPG-compressed pixels.
It follows an interpretation in contemporary English (i.e. AI slop).
1. Power & Wiring
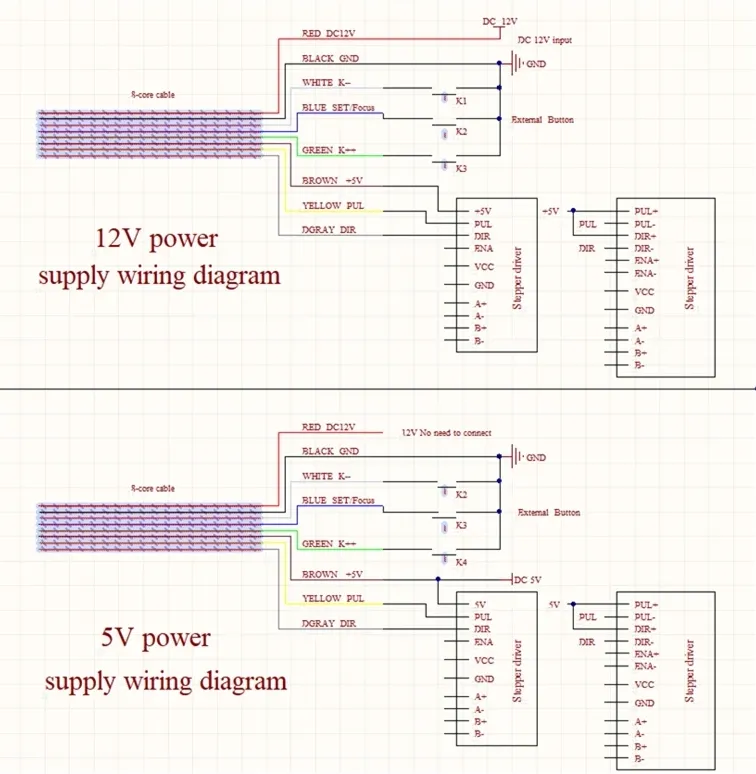
Your autofocus controller can run on 12 V or 5 V, depending on which wiring diagram your unit follows. Both use a 6-core cable and include connections for:
- Focus button inputs
- Stepper driver pulses & direction
- Laser distance sensor power & signal
If your unit came pre-wired to the machine, you usually only need to supply the main DC input and plug in the stepper driver.
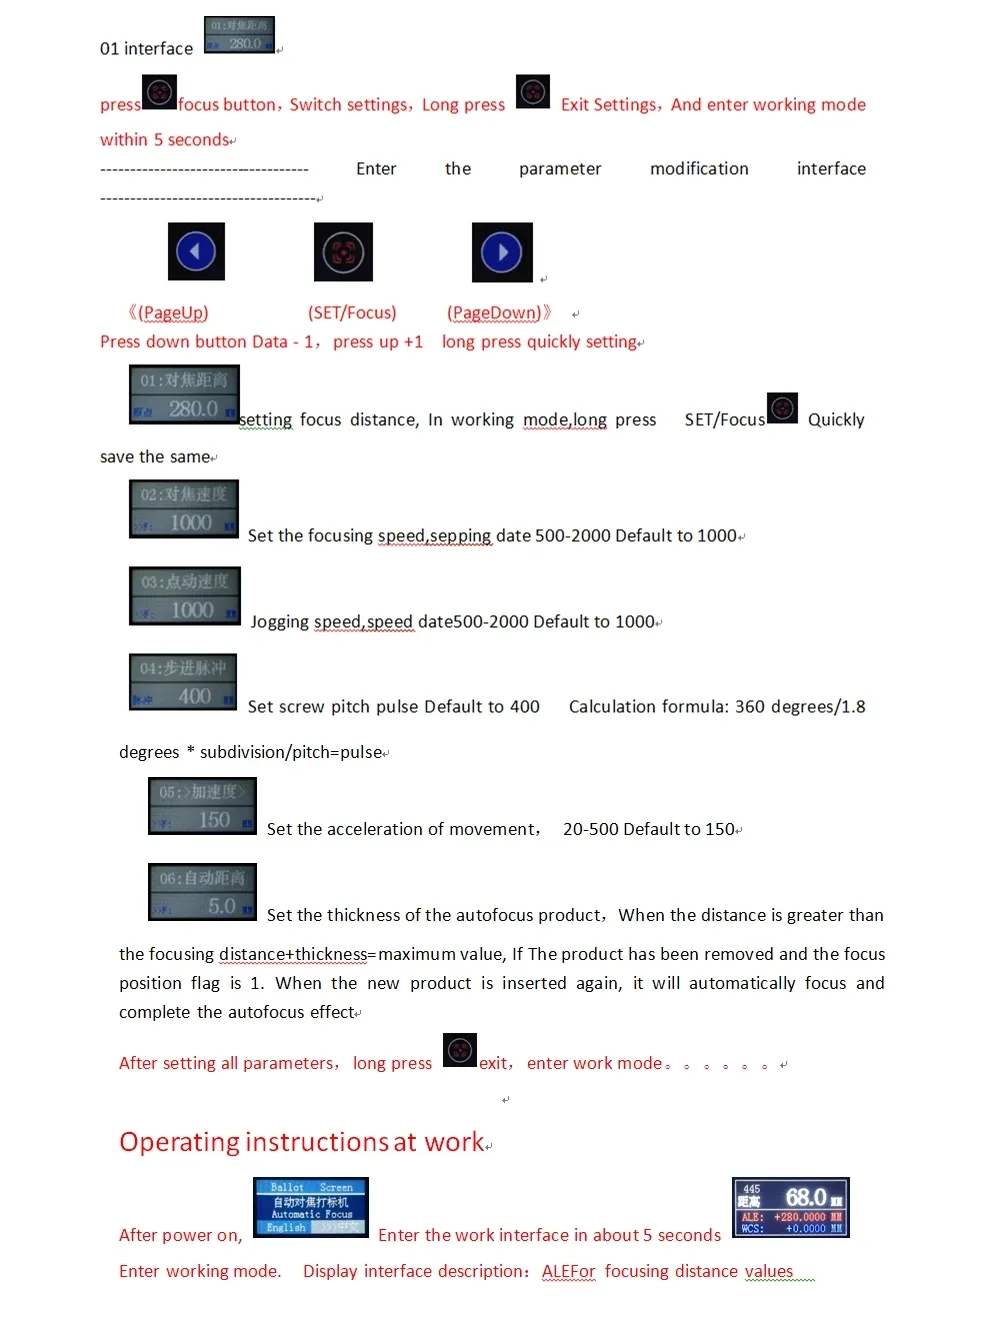
2. Button Overview
The module uses three buttons:
-
Up

-
Middle (SET / Focus)

-
Down

Button roles change depending on power-up and mode, but the basic logic is:
| Button | Short Press | Long Press |
|---|---|---|
| Up | Move Z-axis up / Increase value | Enter autofocus/Manual-focus selection |
| Middle | Confirm / Enter settings | Save parameter |
| Down | Move Z-axis down / Decrease value | Enter language settings |
3. Startup Options
3.1 Change Language (Power-on + Down Button)
With the unit powered off:
- Hold Down.
- Power on.
- The screen enters Language Selection.
Options:
-
Chinese

-
English

Release the button on your desired language.
3.2 Choose Focus Mode (Power-on + Up Button)
With the unit powered off:
- Hold Up.
- Power on.
- Select Autofocus or Manual Focus Mode.
- Autofocus ON → Laser uses distance sensor to maintain focus.
- Autofocus OFF → You manually position Z-axis and store a fixed focus height.
Use Up / Down to change, Middle to confirm.
4. Entering the Parameter Menu
4.1 Accessing Settings
With the device powered off:
- Hold the Middle button.
- Power on → Enters Parameter Setup Mode.
You have ~5 seconds before it boots into working mode normally.
5. Parameter Settings (Menu Items)
Use:
- Up = Increase / Next
- Down = Decrease / Previous
- Middle (SET) = Confirm / Long-press Save
01 – Focus Distance
Default example: 280.0
This is the reference distance measured by the laser at perfect focus. You usually set this once using a known-good focusing card or gauge block.
02 – Focusing Speed (Pulse Rate)
Range: 500–2000 Default: 1000
Controls how fast the Z-axis jogs during autofocus adjustment.
03 – Jog Speed
Range: 500–2000 Default: 1000
Speed for manual Z movement using the Up/Down buttons.
04 – Stepper Pulse Setting
Default example: 400 pulses per revolution
Formula:
Pulse = (360° / motor step angle) × microstepping ÷ screw pitchIf unsure, leave at default unless Z-axis direction or travel distance is wrong.
05 – Acceleration
Range: 20–500 Default: 150
Higher values = snappier movement; excessive values may cause lost steps.
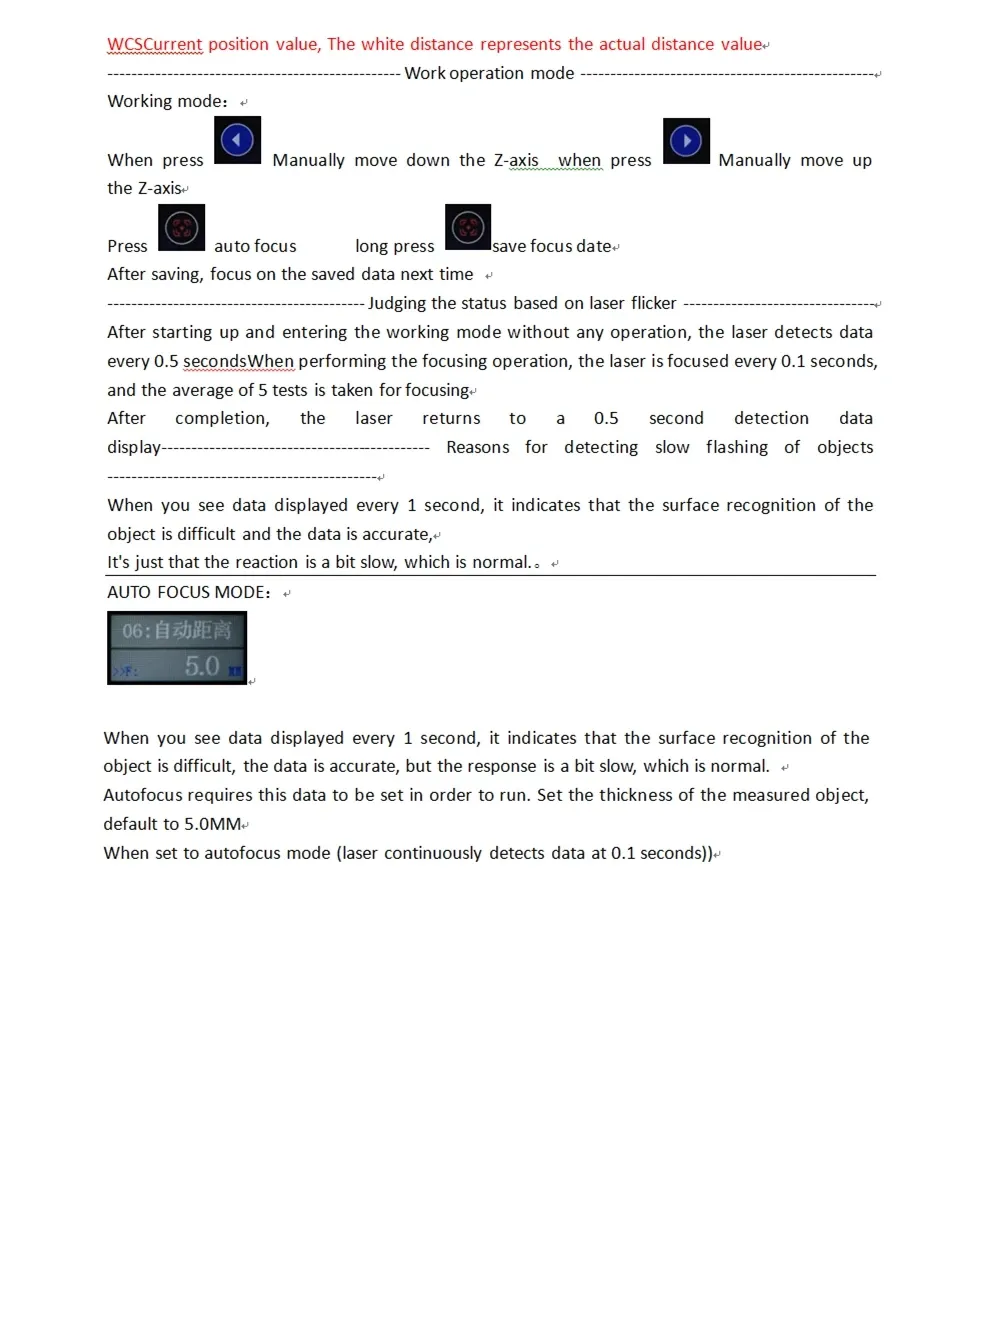
06 – Object Thickness
Default: 5.0 mm
Used in autofocus mode: Sensor distance + this thickness = focus target value.
If the measured distance exceeds this threshold, the controller assumes a new object is inserted, refocuses, and stores a new stable value.
6. Saving Parameters
After adjusting all parameters:
- Long-press Middle (SET)
- System saves and returns to Working Mode
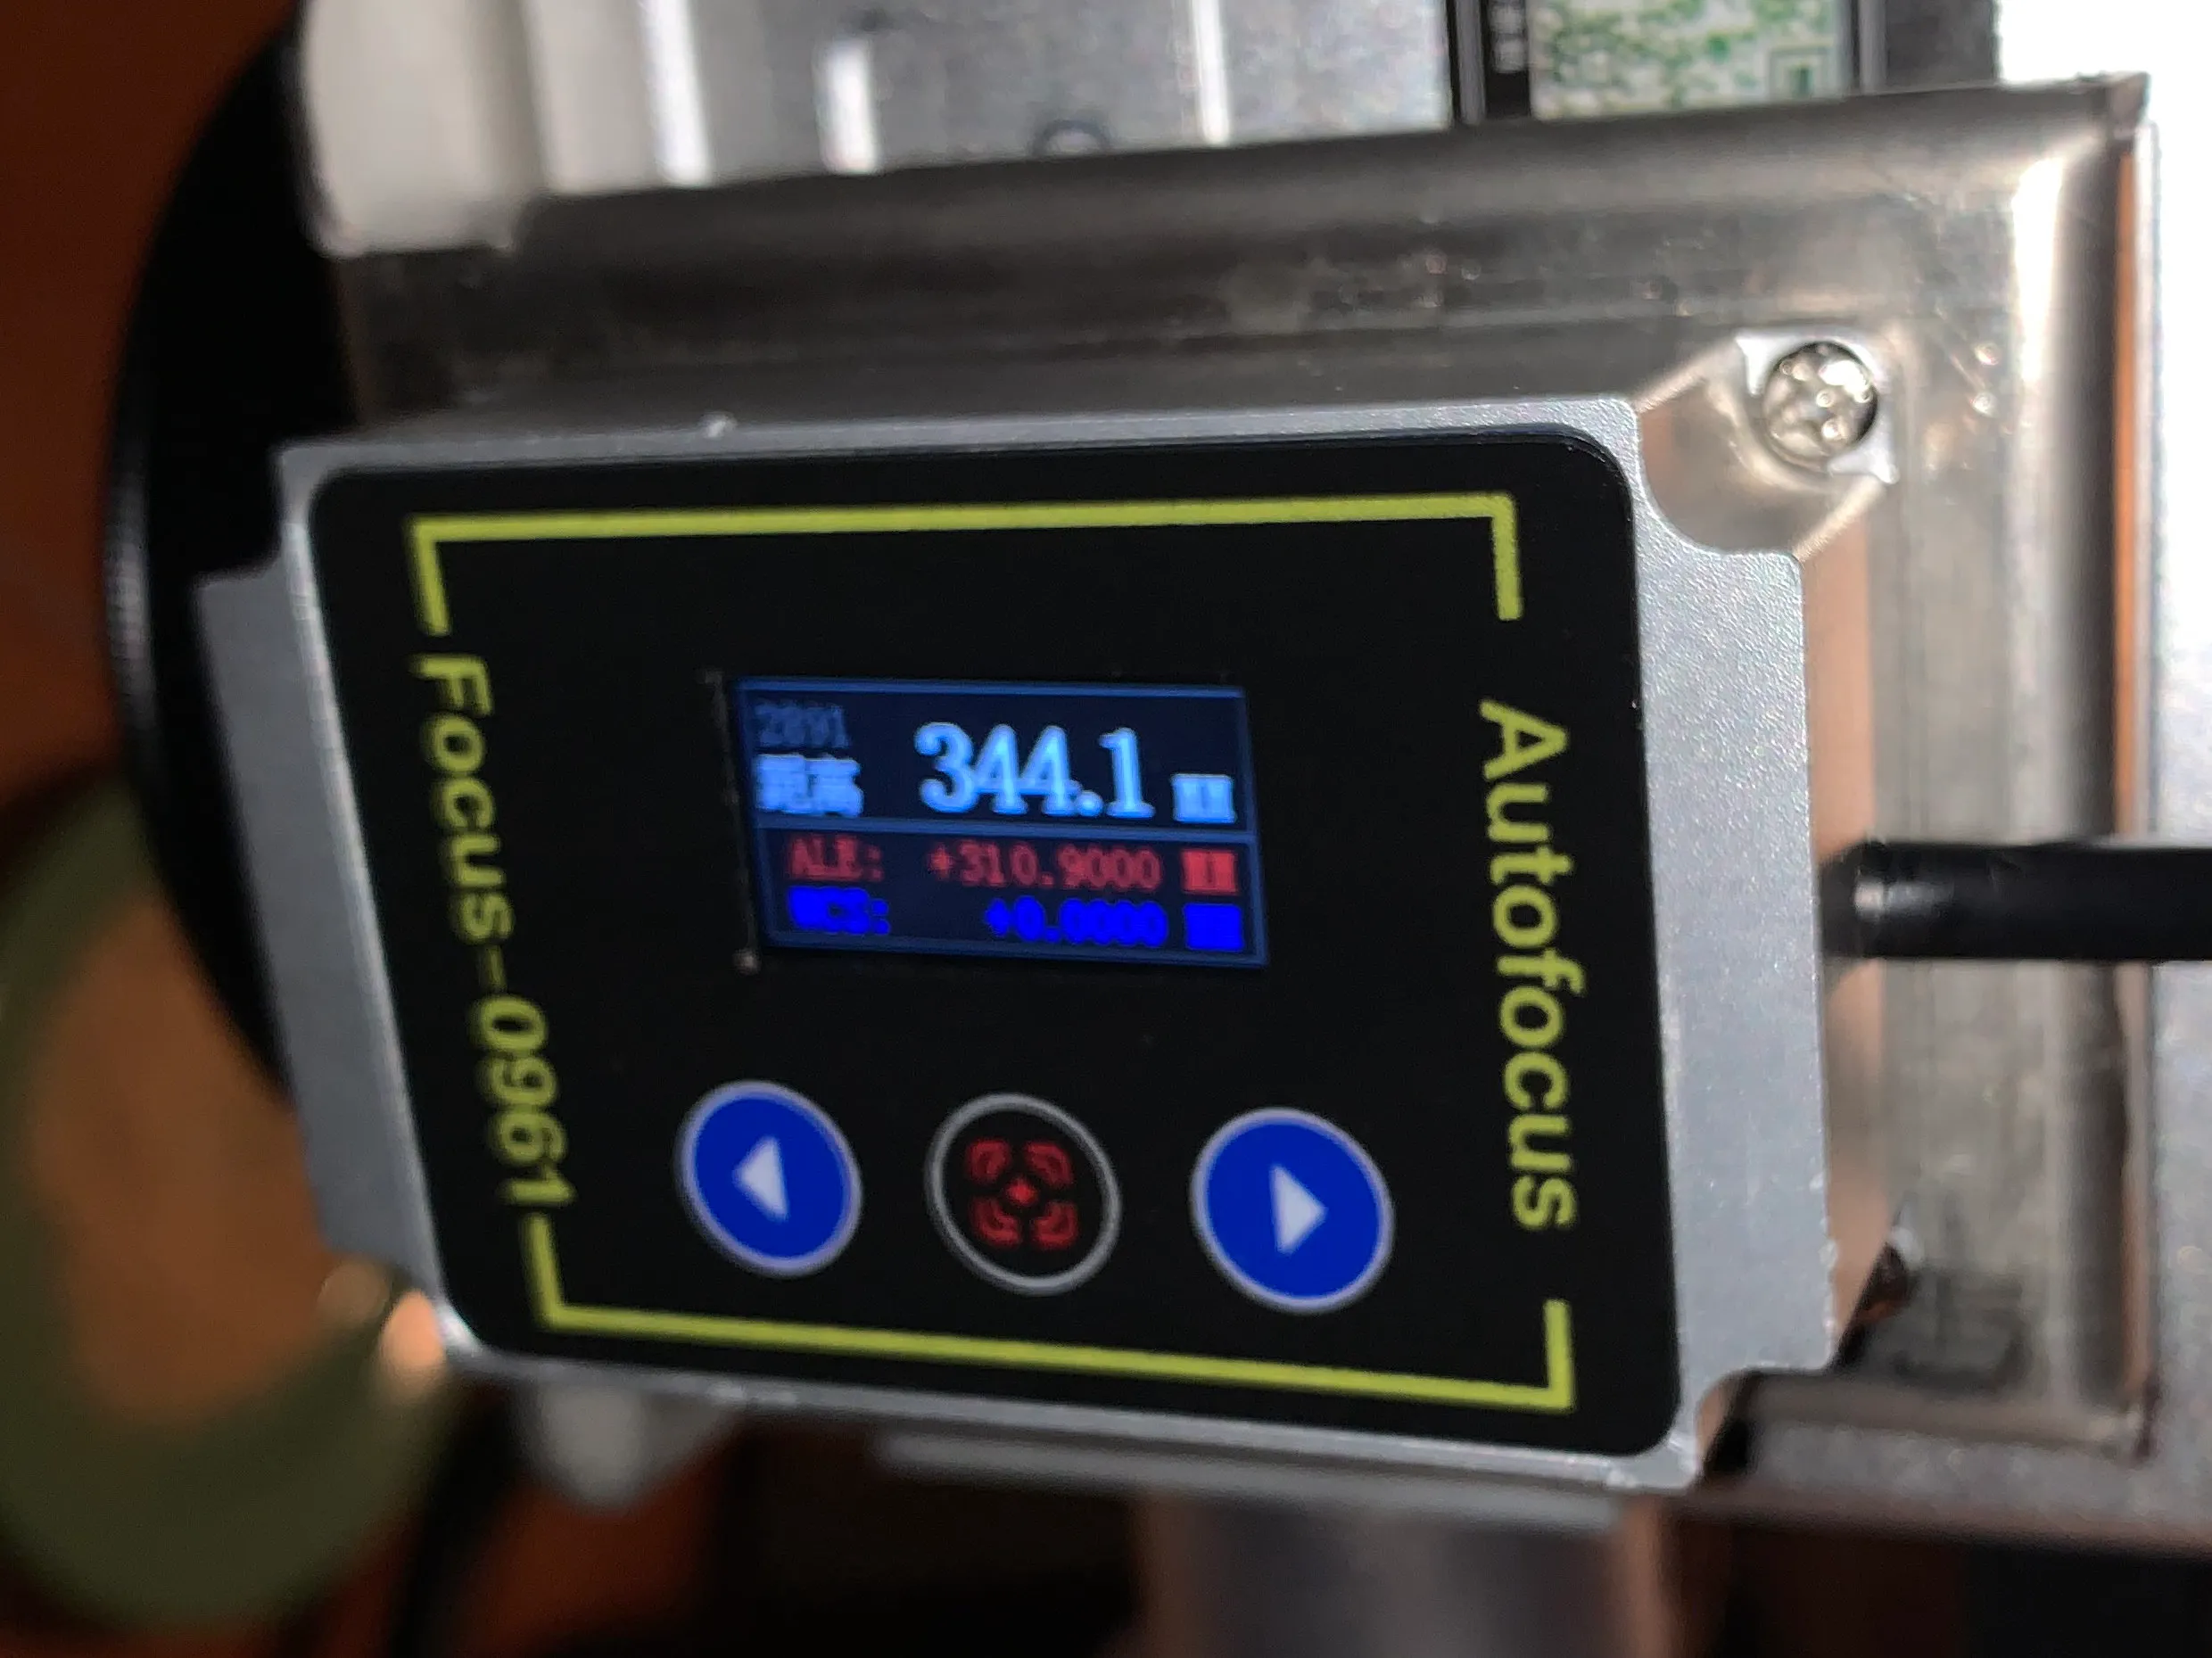
7. Working Mode
After powering on normally:
-
The module loads in ~5 seconds.
-
The main screen displays:
- Current Z-axis position
- Measured distance
- Focused distance reference
You can now manually move the axis:
- Up button: Move Z-axis up
- Down button: Move Z-axis down
To store the current manual focus position:
- Short press Middle → Saves focus reference
8. Laser Distance Sensor Logic
Data Update Speed
- When the surface is easy to detect → 0.1 s refresh
- When difficult (dark, glossy, angled surfaces) → 1 s refresh
This slow flash is normal. The device averages 5 readings for reliable autofocus.
After Focusing
- Laser returns to standard 0.5 s monitoring mode
- If object is removed, the module detects “no target” and waits
- When a new object appears, the unit re-measures and re-focuses automatically
9. Autofocus Mode Behavior
In autofocus mode the laser:
- Continuously measures distance every 0.1 s
- Compares with target distance (Focus Distance + Thickness)
- Drives the Z-axis up/down until alignment is achieved
- Holds position and returns to monitoring mode
If refresh is slow (~1 s), autofocus still works—just more leisurely.
10. Practical Setup Procedure (Recommended)
-
Install focal gauge or focusing card under laser head.
-
Enter Settings → Item 01.
-
Move Z-axis until your machine’s perfect-focus indicator aligns.
-
Press Middle to set that distance (e.g., 280 mm).
-
Adjust speeds only if the Z-axis feels too fast/slow.
-
Set object thickness to something reasonable, e.g., 5 mm, unless engraving very thin materials.
-
Save settings → reboot.
-
Test autofocus:
- Place material
- Press Autofocus button if in manual mode
- Machine should seek proper height automatically.
Appendix: Original documentation